


For more Betta Version 1.0 comic strips, visit MandyMom.com
Tuesday, October 28, 2008
Saturday, October 25, 2008
Homeschooling Daughters
Raising Arrows has a lot of wonderful posts on her homeschooling blog. I've really enjoyed reading her posts about Homeschooling Daughters, and thought I'd share those links here.
Homeschooling Daughters Part 1, Part 2, Part 3.
Homeschooling Daughters Part 1, Part 2, Part 3.
Friday, October 24, 2008
Easy recipe for a personal-size chocolate cake!
I came across this cool recipe while blog hopping and am definitely going to test it out. Sometimes I have a craving for chocolate cake, but don't feel like making a whole cake. Heather over at Want What You Have shared this recipe from another blog she came across, and I'm passing it on to you! I think this would make a great project for young children learning how to cook.
Ingredients
4 Tbsp self-rising flour (NOTE: If you don't have self-rising flour, you can easily make your own by mixing 1 cup all-purpose flour with 1 1/2 tsp baking powder, and 1/2 tsp salt).
4 Tbsp sugar
4 Tbsp cocoa
1 egg
3 Tbsp milk
3 Tbsp oil
3 Tbsp semi-sweet chocolate chips (if desired)
A splash of vanilla extract
1 large coffee cup
Add all dry ingredients, except chocolate chips, to the cup and mix well. Add the egg, milk, oil & vanilla extract and mix very well. Fold in chocolate chips, if desired. Put cup in the center of your microwave and cook for 3 minutes on high (1000 watts). The cake will rise over the cup a bit, but thats normal.
Top with icing or coolwhip! Btw, make sure your coffee cup can be microwaved. Some cannot! (I use to have some that couldn't be microwaved. I ended up donating them to Goodwill, because, well, I always forget about my coffee and need to microwave it!)
Feel free to share this on your blog. If you test it out, let me know how it worked for you!
Edit:
The first time I tried this, I did it in a large "soup" mug (which is wide, not tall). The cake was a little dry, and I wished it was a little sweeter. It definitely does make one large serving! It'd be perfect for making one of those small personal birthday cakes for babies to chow down on.
Anyway, I decided to try it again. This time, I added another tablespoon of sugar. I also added a couple squirts of chocolate syrup and mixed it all in. I divided the cake mixture into two regular sized coffee cups (which I greased first). I put a little squirt of chocolate syrup on the top of each cup after filling them with mixture, then microwaved for ONE minute.
The cakes were very moist, and just the perfect amount of sweetness. (And, splitting the cake mix into two mugs made the perfect serving size!)
I have pictures to post later! :)
Thursday, October 23, 2008
Blogger Awards!
It's that time of year! Go nominate your favorite blogs for awards!
(In case you're wondering, The Precious Mind would fit into "Best Crafts, Plans & Projects Blog". Yanno, just in case you'd like to nominate us!)
(In case you're wondering, The Precious Mind would fit into "Best Crafts, Plans & Projects Blog". Yanno, just in case you'd like to nominate us!)

The Precious Mind is looking for homeschooling mothers, fathers, or students to write articles, reviews, and share their homeschooling stories here at TPM. You may also submit pictures to be displayed on the TPM site.
If you're interested, please email Mandy @ contact (at) mandymom (dot) com
Monday, October 20, 2008
Native American themed crafts
My friend Courtney is doing a unit study on American Indians. She came up with some unique ideas to make Indian corn necklaces and cornhusk dolls. It reminded me of a craft my dad use to do with us. (Maybe sometime I'll find a picture of my brother and I dressed up in our creations to post.)

Find a paper bag from the grocery store. Usually, they have print on the outside, so you might want to flip it inside out before you get started. So, first step- you have your brown paper bag. Secondly, you cut down the middle of one side, and continue cutting into the bottom of the bag. Cut out a circle in the bottom of the bag (step 3). This will now be the top where a little head will be poking through. Next you need to cut out arm holes on each side (step 4). Cut them high up on the sides and make them large enough for some flexibility. Cut fringe (step 5) along the bottom of the bag (which was once the top, remember). Then decorate!
You might want to make an Indian headband (as shown in the drawing) to go along with the vest. If you do this project, post it on your blog and send me the link, or send me a picture link to post here.
 When I was a kid, one of my favorite books was The Legend of the Indian Paintbrush (Tomie dePaola). I loved to paint then just as much as I do now. This book spurred me to look into the old-fashioned ways of making paint colors.
Another good book (also by Tomie dePaola) is The Legend of the Bluebonnet (my state's flower, and also my favorite!). The illustrations are so beautiful. I'm one of those people who never outgrew children's books because I love the art!
Enchanted Learning has a bunch of neat Native American crafts, like paper towel totem poles, dream catchers, and rain sticks!
I also found this link, which has pretty cool ideas as well. The Indian Leather Painting (also using a brown paper bag) is really cool. I did that when I was a kid as well!
Friday, October 17, 2008
Crafts from every day items

Last spring, our family went to Baton Rouge to celebrate Easter with our friends. That weekend, we went to a children's museum. They had a little section full of items like toilet paper rolls, fabric, egg cartons, and more for children (and their parents) to make anything they could think up. I took pictures of some of the things they have displayed. There were loads of cute creations- which inspired me to hold on to the items that I'd normally toss (egg cartons, jugs, newspaper, etc). My son likes to use the fridge boxes colas come in to make "robot arms". Toilet paper rolls become binoculars. They enjoy playing with these things more than they do those pricey toys!

If you have posted a picture about using everyday items for toys and art, please, leave a link to your post in a comment! I'd love to see it!
Wednesday, October 15, 2008
Days of the Week: Praise Him! (mp3)
Hey y'all,
After a few requests (okay, a couple- just two), I decided to record myself singing Praise Him: The Days of the Week song which I made up (using the tune from The Grumblers). Feel free to share it with your children and sing it with your family. We usually dance around the house singing it. Please, don't make fun of my voice. I had to redo it a couple times because I realized how hick I sounded. Ha! I'm not a professional singer (as you can tell), but I did my best. (And, as I tell my children- that's what counts!)
After a few requests (okay, a couple- just two), I decided to record myself singing Praise Him: The Days of the Week song which I made up (using the tune from The Grumblers). Feel free to share it with your children and sing it with your family. We usually dance around the house singing it. Please, don't make fun of my voice. I had to redo it a couple times because I realized how hick I sounded. Ha! I'm not a professional singer (as you can tell), but I did my best. (And, as I tell my children- that's what counts!)
| Praise God: Days o... |
Tuesday, October 14, 2008
Free (that's right, FREE) Lesson Plans
 Curriculum can cost thousands of dollars. As someone who uses Sonlight curriculum, let me tell you, a good quality curriculum is well worth the money, but I also understand that not everyone can afford such a luxury. Sonlight was our early Christmas gift to the kids- and they certainly didn't feel like they were cheated because it's full of wonderful books and creative games. If you really want to purchase a curriculum set, be creative in ways you can set aside money for it. Look for curriculum that is reuseable, so you can use it with your other children, or sell it when you're finished. When purchasing curriculum, remember- cheaper is not always better!
Still, if you can't afford it (especially with the economy the way it is), don't give up on homeschooling. You don't have to have curriculum to homeschool. If you prefer to have written lesson plans, here's a list of wonderful links with quality lesson plans. You can use these resources to create your own curriculum, or, if you're unschooling/deschooling, you can print a few things for your children to dive into when they're ready.
Tip: Try right clicking and open these links in a new window or tab. I have put my favorites in bold.
Environmental Lesson Plans
American Heritage Education Foundation
Word & Number Puzzles from Discovery
Thinkfinity (K-Adult Education)
Scott Foresman Grammer & Writing Handbook (grades 1-6)
Core Knowledge
The Curriculum Archive
A to Z Teacher Stuff
Lesson Plan Central
Lesson Plans & Teaching Strategies
Microsoft Lesson Plans
Discovery Education
The Teacher's Corner
TRIP for Teachers
Blogger Friend School
I came across a really cool site today and wanted to share it with all of you.
 "BFS is a full school year of fun-filled assignments to Build Friendships, Strengthen Faith, and Journal your Memories! Our goal is to encourage a community of homeschool moms to learn together while writing out special memories."
Blogger Friends School, or BFS, is a free place for homeschooling moms to meet up and participate bible verse memorization, writing prompts, and picture sharing.
BFS Assignment #105:
Post your favorite fall recipe to share. Post a picture of your finished product, or you could just post a picture of the recipe. How about a picture of you cooking? The sky is the limit. Post your favorite verse in your post.
I don't know about you, but when I think about fall, I think about family. When I think about family, strangly enough, I think about food. Why? Fall is a time when my family gathers together for fellowship and feasts in celebrating Thanksgiving. There are all sorts of great dishes served up from brown sugar and cinnamon yams to warm yeast rolls.
One of my favorite recipes to make with the kids is an apple cobber. It's super simple and doesn't involve a lot of mess (because you mix the ingredients in the dish you'll be baking it in!).
1/2 cup butter/margarine
1 cup flour
1 cup granulated sugar
2 teaspoons baking powder
3/4 cup milk
1/4 teaspoon salt
1- 21oz can fruit pie filling.
Melt butter into a 9X9 casserole dish. Stir in flour, sugar, baking powder, milk and salt until all lumps are gone. Dump fruit on top, but don't stir in. Bake for 30-45 minutes, or until well browned on top. Serve hot with cold icecream (and maybe a drizzle of caramel syrup)!
"BFS is a full school year of fun-filled assignments to Build Friendships, Strengthen Faith, and Journal your Memories! Our goal is to encourage a community of homeschool moms to learn together while writing out special memories."Blogger Friends School, or BFS, is a free place for homeschooling moms to meet up and participate bible verse memorization, writing prompts, and picture sharing.
BFS Assignment #105:
Post your favorite fall recipe to share. Post a picture of your finished product, or you could just post a picture of the recipe. How about a picture of you cooking? The sky is the limit. Post your favorite verse in your post.
I don't know about you, but when I think about fall, I think about family. When I think about family, strangly enough, I think about food. Why? Fall is a time when my family gathers together for fellowship and feasts in celebrating Thanksgiving. There are all sorts of great dishes served up from brown sugar and cinnamon yams to warm yeast rolls.
One of my favorite recipes to make with the kids is an apple cobber. It's super simple and doesn't involve a lot of mess (because you mix the ingredients in the dish you'll be baking it in!).
1/2 cup butter/margarine
1 cup flour
1 cup granulated sugar
2 teaspoons baking powder
3/4 cup milk
1/4 teaspoon salt
1- 21oz can fruit pie filling.
Melt butter into a 9X9 casserole dish. Stir in flour, sugar, baking powder, milk and salt until all lumps are gone. Dump fruit on top, but don't stir in. Bake for 30-45 minutes, or until well browned on top. Serve hot with cold icecream (and maybe a drizzle of caramel syrup)!

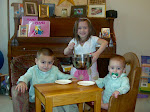
Here are two of my munchkins helping their Uncle John bake a cake.
Sounds delicious right? Unfortunately, I don't have a picture of the cake, or us making it!
Maybe I'll come back and post one next time we bake it.
Made from what?
I love listening to little children talk. It's pretty funny how they mispronounce words. For example, my parents told my daughter they were going to a church convention, and she told me she wanted to go on a church adventure.
She calls the Renaissance Festival the Renaissance Vegetable. (At first the called it the "vestibule"!)
Today, we watched a show about how wheat was ground into flour and made into breads. As she was eating her muffin at lunch, she proudly exclaimed, "Mom! This muffin is made from weed!"
I choked on my drink. As it dribbled out my nose, I asked, "It's made from what?"
"Weed!"
"Are you sure it's made from weed?" I queeried.
"Oh, I mean wheat," she corrected, emphasizing the T, as she looked at the package trying to read the ingredients.
I don't want her going around telling folks we serve muffins made with drugs, now!
Monday, October 13, 2008
Teach Your Child to Read!
Did you know the English language is the largest language on earth? I have friends from other countries who had to learn English. All of them have told me that English was the most difficult language for them to learn (and some of them speak several languages). That is because our language has so many rules-- rules which break themselves far too often, plus words that sound alike but don't look alike along with words that look alike, but sound different.
Your children are probably already halfway there if they have a great vocabulary. It may take a while for them to read, but pressuring them doesn't help. The best thing we can do for our children is read to them often, DAILY, and hold meaningful conversations with them throughout the day to build their vocabularies and their love of reading.
One way to help your child get into reading is to give them small successes that spur them on to learn more. By teaching them six letters (over 3-6 weeks), they can get a taste for reading without knowing the whole alphabet! The best way to do this is to teach them a different letter each week. Instead of teaching them the name of the letter, teach the sound of the letter (phonics).
Try these six letters: B,C, H, S, T, and A. Instead of teaching them all the sounds of these letters, just teach the main, most common sound. (Remember, C sometimes sounds like an S, and A has quite a few sounds. There is no need to teach your child this yet.) The sound you will use for A is the same sound as in apple and cat.
Here's what one week might look like:
- Point out the letter B. Make the sound for letter B, not the name of it.
- Look through a book or magazine, or go on a walk and point out things that start with the B sound. You can even walk through your house pointing out these things. Call it a treasure hunt for the B sound!
- Have your child trace the letter B (written as large as a single piece of paper) with his or her finger.
- Write the letter B on a piece of paper (with or without lines) and have your child trace it with a pencil, then try to draw it himself. Don't worry about the size of his letter, just make sure he draws the letter in the right direction (most letters start at the top and go down) and is writing left to right. Do this daily.
- Keep talking about the sound it makes, and what words start with that sound or have that sound in it.
Each week, use a different letter, until you get to the letter A. With the letter A, you will talk about words like bat, cat, hat, mat, at, etc that have the letter A in it.
Now your child might be ready to read. Test the waters by writing out a short story like this. (Feel free to use this one):
CAT.
CAT HAS A HAT.
CAT HAS A BAT.
BAT CAT!
You might even want to draw (or cut out) some pictures of a cat with a baseball bat to make it more stimulating for your child. The stories do not need to be long (or even make a lot of sense). The point is your child can easily read these stories and will feel SO excited she can! This is a big accomplishment in her eyes and will have her eager to learn more.
If you don't already have a few Dr. Suess books, you may want to purchase or borrow a few. They're great starter books for new readers.
Sunday, October 12, 2008
Lapbooking & Notebooking.
I love lapbooking, even though we haven't done much of it lately. I need to buy more file folders and get back into it. I like notebooking too, at least, I think I do. I haven't had a chance to put it to use. (Okay, I've had many chances- I just haven't done it yet.)
I found a couple spare binders when I was cleaning out my closet and thought, "Hey, we should start notebooking."
I've notebooked as a kid- not realizing that's what I was doing (back then I didn't realize there was a name for it), but I haven't used this method on my children. I'm sure they'd love it.
Anywho, here are links on lapbooking and notebooking... and a picture of our one lapbooks creations.
http://www.squidoo.com/lapbooking
FREE lapbooks from Homeschool Share
http://lapbooklessons.ning.com/
Notebooking Pages
Notebook Learning
http://www.ignitethefire.com/fuel.html
http://www.homeschoolhelperonline.com/
http://www.enchantedlearning.com/
I found a couple spare binders when I was cleaning out my closet and thought, "Hey, we should start notebooking."
I've notebooked as a kid- not realizing that's what I was doing (back then I didn't realize there was a name for it), but I haven't used this method on my children. I'm sure they'd love it.
Anywho, here are links on lapbooking and notebooking... and a picture of our one lapbooks creations.

http://www.squidoo.com/lapbooking
FREE lapbooks from Homeschool Share
http://lapbooklessons.ning.com/
Notebooking Pages
Notebook Learning
http://www.ignitethefire.com/fuel.html
http://www.homeschoolhelperonline.com/
http://www.enchantedlearning.com/
Friday, October 10, 2008
Links to Great Homeschooling Resources
If you have a homeschooling site or blog and would like to trade links, please grab my icon (left side), post it on your site with a link to me, and then leave me a comment. You will then be added!
This page will be updated weekly.
Homeschool Laws
Homeschooling Support and Forums
The Homeschool Lounge
Homeschooling 'Zines, Articles, and Awards:
Heart of the Matter
Homeschooling Today
Homeschool Blog Awards
The Six-Lesson School Teacher (article about school system)
No thanks. We don't believe in socialization (article)
Free Resources:
TEACH-nology (lots of free curriculum/lesson plans)
Teach a Child to Read
The Garden of Praise
ABCteach
Smithsonian American Art Museum
Interesting & Useful
StateMaster (State statistics and more, useful for comparisons)
Blogs
Home Educate in the Sunshine State
Luke's Sonlight Blog
An Untraditional Home
Christian Unschooling
Freely Educate
Homeschool ID Cards:
Some places offer discounts to teachers, but you'll need a teacher ID. You can make your own, or use these links to create one for you. I make IDs for friends, so.. if you're my friend, ask me! Remember, when making a ID, you'll need a decent photograph, just you, alone, with a solid background. Buy laminating sheets to protect your card.
Homeschool Buyers Co-op (looks like the card below)

Curriculum:
I use Sonlight for several reasons. First of all, we're not super structured, and I have no desire to be structured. I don't want to bring a strict school environment into my home. I want learning to be fun. Sonlight helps me teach my children the things they need to know, even providing me with a lesson plan, while being flexible and fun.
Secondly, I love to read. My children love to be read to. My daughter can't wait to read on her own. Sonlight is full of great books which teach children all sorts of things, without them even realizing them. I'm not talking about textbooks, I'm talking about real books, like The Boxcar Children. Some are old classics, and some are sure to be new favorites. There's a great variety.
If you are unschooling, but feel you want a bit of structure, or you are deschooling (coming out of a schooling environment), Sonlight would be a great assistance to you! Go to their website and get a free catalog delivered to your home!
It may seem pricy, but it's worth it, even if you can only buy a little bit of a time, or choose to purchase only one subject. (And, if you are going to be selective in your subjects, I recommend that you purchase the Core for the grade level you desire, which includes Readers, Read-Alouds, History.. and more! (The History part includes some really cool books!)
The best thing about Sonlight is it's reusable. Every year, I purchase the curriculum for my oldest child (daughter). My other children use it when they are ready! (For example, my son will use her Kindergarden curriculum next school year.) Plus, because Sonlight includes books to read-aloud, the whole family can listen in and participate- even Dad.
You can choose a four day plan or a five day plan. We have chosen to do the four day plan, which allows for even more flexiblity.
This page will be updated weekly.
Homeschool Laws
Homeschooling Support and Forums
The Homeschool Lounge
Homeschooling 'Zines, Articles, and Awards:
Heart of the Matter
Homeschooling Today
Homeschool Blog Awards
The Six-Lesson School Teacher (article about school system)
No thanks. We don't believe in socialization (article)
Free Resources:
TEACH-nology (lots of free curriculum/lesson plans)
Teach a Child to Read
The Garden of Praise
ABCteach
Smithsonian American Art Museum
I Know That (interactive/games)
Interesting & Useful
StateMaster (State statistics and more, useful for comparisons)
Blogs
Home Educate in the Sunshine State
Luke's Sonlight Blog
An Untraditional Home
Christian Unschooling
Freely Educate
Homeschool ID Cards:
Some places offer discounts to teachers, but you'll need a teacher ID. You can make your own, or use these links to create one for you. I make IDs for friends, so.. if you're my friend, ask me! Remember, when making a ID, you'll need a decent photograph, just you, alone, with a solid background. Buy laminating sheets to protect your card.
Homeschool Buyers Co-op (looks like the card below)

Curriculum:
I use Sonlight for several reasons. First of all, we're not super structured, and I have no desire to be structured. I don't want to bring a strict school environment into my home. I want learning to be fun. Sonlight helps me teach my children the things they need to know, even providing me with a lesson plan, while being flexible and fun.
Secondly, I love to read. My children love to be read to. My daughter can't wait to read on her own. Sonlight is full of great books which teach children all sorts of things, without them even realizing them. I'm not talking about textbooks, I'm talking about real books, like The Boxcar Children. Some are old classics, and some are sure to be new favorites. There's a great variety.
If you are unschooling, but feel you want a bit of structure, or you are deschooling (coming out of a schooling environment), Sonlight would be a great assistance to you! Go to their website and get a free catalog delivered to your home!
It may seem pricy, but it's worth it, even if you can only buy a little bit of a time, or choose to purchase only one subject. (And, if you are going to be selective in your subjects, I recommend that you purchase the Core for the grade level you desire, which includes Readers, Read-Alouds, History.. and more! (The History part includes some really cool books!)
The best thing about Sonlight is it's reusable. Every year, I purchase the curriculum for my oldest child (daughter). My other children use it when they are ready! (For example, my son will use her Kindergarden curriculum next school year.) Plus, because Sonlight includes books to read-aloud, the whole family can listen in and participate- even Dad.
You can choose a four day plan or a five day plan. We have chosen to do the four day plan, which allows for even more flexiblity.
What were my twelve years of schooling for?
It’s clear that people do not understand homeschooling at all. There are various methods to choose from, various ways of doing it. I’m sure some people who choose to homeschool their children are doing their child a disservice, but that’s not usually the case.
I believe the misunderstandings come from the name “home” schooling. People believe we stay at home, plop a book in front of our child, and try to teach them from our own knowledge. While this could work, it will only take you so far.
So how do you teach those tougher subjects? You get your child involved! Imax had an awesome film on the human body that is useful in teaching biology. It’s now available on DVD, I believe. You could also take your child on a tour of a pharmaceutical company or a hospital (Researching how and why a hospital makes a commitment to sterilization is very interesting- it was one of the subjects I chose to research when I was eleven. I was even able to go into the NICU and see the little babies!). You can talk to various doctors (many doctors will take the time to discuss what they do, why they do it, etc), research various conditions and diseases, and watch videos. You may want to have someone who has had cancer or another disease come speak to your children- then you can research exactly what cancer is, what is looks like, etc.
Why do people try to limit how we learn and who can teach? Maybe it’s because that’s what happened in our schools? Institutional schools are always “changing the rules”.
I have a question. Why did we go to 12 years of school (plus kindergarten)? Teachers always told us it was so we could have careers. So we could make something of ourselves. I cannot tell you how many times I heard, “You need to learn this because you’re going to use it later in life.”
So, it’s later in life! I’m using everything I learned to teach my children, PLUS other resources (people, places, things) available to me as well. How can it be that I’m NOT equipped to teach my children when I have already been taught all of the things I’m suppose to teach them?
I have found that the people who are so very against homeschool really don’t know anything about it. Maybe they have one or two examples of homeschooling gone bad and assume that’s how it all goes, but that’s not truth. In fact, top schools like Harvard and Yale love homeschoolers!
On the other hand, most homeschoolers have a very good idea of what instituational schools are like, which is why they’ve chosen to homeschool. So, before you go trashing it, maybe you should give it a whole-hearted try!
Homeschool Tips: A Mission Statement
There probably isn't a single homeschooling family that hasn't been asked why they chose to homeschool. (Funny, I don't go around asking people why they chose to send their children to public school....) Fact is, when you do something different from the norm, you'll probably have your fair share of questions and criticism.
I have found it's helpful to make a homeschooling binder, not for curriculum, but filled with reminders of why you homeschool. There will likely be times when you feel discouraged or beaten down, so it's nice to have something to put it all back in perspective.
When you think about why you homeschool your children, a list of reasons probably pop into your mind. Take the time to write these reasons down, and explore each one in depth. There will be those who argue with you, and you'll feel better prepared to defend your rights if you have really solidified the reasons behind your choice. You'll be able to articulate exactly what you believe and feel, without getting flustered.
So, write a mission statement. Jot down what your homeschooling goals are. Write down what you want to avoid. Write down what is important to you. Go in depth.
Sometimes people ask me, "You don't want to shelter your children, do you? Don't you want them to be able to think for themselves?"
Well, let me talk about the first sentence first. What's wrong with sheltering my children? Why shouldn't I shelter my children? In fact, throwing my children out into the wild doesn't sound reasonable to me. It makes me cringe to think that people have fallen into the belief that we shouldn't shelter our children. Of course, there are people who take it overboard, but, I promise you, we don't choreograph our children's every move and thought. We don't stand over their shoulder all the time, breathing down their little necks.
There is nothing wrong with sheltering your children from the world. There is nothing wrong with desiring to protect them from filthy mouths and filthy minds. Little ones are like little sponges. They soak up everything. As parents, we need to be the filter, because they don't have one. I've received criticism for that, but, I'm sorry (not really), I don't want my children learning about sex at the underripe age of five, or being pressured into it at the age of twelve. Schools are poisoned with sexual misconduct, but parents and teachers have taken the ostrich approach (head in the sand). How can I raise children to be pure and chaste if, from a young age, they spend most of their time with people who don't care about preserving their innocence and encouraging purity?
I'm also told that I'm brainwashing my children by focusing on the bible. Therefore, according to this non-logic, anyone who raises their children "in the way of the Lord" as the bible directs is brainwashing. If that's the case, I think everyone could use a little brain washing using God's word as soap!
There are loads of things out there that could "brainwash" our children. Television is one of them, yet most people have no problem allowing their children to sit in front of the boob tube for hours on end. I know people who allow their toddlers to watch Family Guy, a cartoon filled with adult material and clearly marked for adults. (Although, I don't think anyone, even an adult, should watch it). Do they not realize or care that their children are soaking up the behavior they see displayed on television shows? You can't say one thing ("This is bad, Junior!") and then allow them to watch the behavior or take part in it as you all laugh.
I saw this plain and clear when my daughter became obsessed with Hannah Montana. I walked in the room to find her doing some sort of dance which involved grinding her hips and singing with a raspy, "sexy" voice, and I nearly had a heart attack. I thought the Disney Channel was for children, but it is sending forth a message that I don't care for.
For one, it's teaching my daughter to move her body in a way that's not becoming of a little girl (or a grown woman). Secondly, the show was teaching her how to be a drama queen. Check out some of the shows geared towards girls. There's a lot of fluttering about, emotional mumbo jumbo, and diva-like behavior.
We canceled cable.
My point again: There are loads of things out there to "brainwash" our children. What brainwash really means in these cases is influence. What do you want to be the biggest influence in your children's lives? A stranger? Another child? You? The people your children are around the most will influence them the most.
Of course people will have questions about (ugh) socialization, a subject most homeschoolers think is absolutely ridiculous (as if public school is the only place to receive socialization). Personally, I perfer healthy socialization with people who are kid, respect other's space and beliefs, and whose speech is encouraging and uplifting.
If you would like to read one of our mission statements (sort of), you can click here:
Why We Chose to Shelter Our Children
Now, back to the original question. "You don't want to shelter your children, do you? Don't you want them to be able to think for themselves?"
Obviously, I do want to shelter my children. Again, you can read more about that in my mission statement (linked above). Do I want them to be able to think for themselves? Of course I do? Sheltering children does not mean I forbid them to think for themselves. If anything, throwing them out into the world ensures that they will not think for themselves. They will be told by their peers what is cool. Their peers will define who they are. Their peers will tell them what to think. My job, as a parent, is to bring out the best in my child and to help them use their talents and gifts for God's purpose. In short, my job is to help them become the person God made them to be.
Our children are not birds. We don't have to throw them out of the nest to teach them how to fly. We can teach them how to fly within the boundaries of our home. We can teach them how to be responsible. We can teach them how to be confident and strong in their identity because their identity is in Christ. And because their identity is in Christ, they won't feel as tempted to bend to the pressures of peers and society.
So, I've rambled on, but this shows you the importance of really thinking about the questions you have been or may be asked, and to really get deep down into the reasons why you are homeschooling. Of course, there are other reasons that aren't so deep, like, "It's just plain fun!"
What are some of your reasons for homeschooling?
Wednesday, October 8, 2008
Inexpensive Resource: Beads
 Beads: Small but Mighty!
Curriculum can get expensive, and some people cannot afford to buy fancy lessons with fancy pieces, but here's a simple item that can teach many things! Beads!
Of course, children who still have a tendency to put things in their mouths should not play with beads, but you know when your child is ready. (And, word to the wise, you might want to make sure your three-year-old doesn't shove them up his nose... not that we had that happen.... or, um.. anything.)
A bag of beads is pretty cheap, but have so many uses. First of all, the obvious. Beads are great for sorting colors. Give your child a handful of beads and ask him to sort it out. Don't tell him how to sort him out, though. See what creative way he comes up with.
Don't be too much of an adult that you don't take the time to join in the fun. I usually participate in most of my children's activities as well. While he's sorting his beads, you can be sorting a pile of your own. Maybe he'll pay attention and copy you, maybe not. After a while, ask him how he's sorting his beads, and then explain how you are sorting yours (by color). Ask him, "What is your favorite color bead?"
Beads can also be used to make letters and shapes. Take a piece of paper and draw the letter your child is learning on it (big enough, but not too big that you won't have enough beads to "trace it" with). Have your child trace her finger over the letter, and then place the beads along the lines of the letter.
 Use the beads to form pictures, maybe yellow beads to shape a sun, blue beads to shape clouds, green beads for grass and so on. If you just let your child use her imagination (no directing and correcting every little thing) as she plays with the beads, she'll probably come up with some cool ideas.
Give your child a string (a shoelace or piece of yarn works) to thread the beads on. This takes quite a big of coordination! Some children will naturally make a pattern, some will not.
Beads are great to use for math as well. This gives them a visual as you add and subtract beads. There are so many different ways to use beads. The possibilities are endless! Try coming up with your own ideas (maybe even a game) using beads.... and let me know what they are!
Beads are great to use for math as well. This gives them a visual as you add and subtract beads. There are so many different ways to use beads. The possibilities are endless! Try coming up with your own ideas (maybe even a game) using beads.... and let me know what they are!

Tuesday, October 7, 2008
DIY Comic Books
When I was a kid, I loved comic books. It was likely a passion inherited from my dad, who was really into them as well. My brother and I use to make comic books of our own on lazy afternoons. You can do this too, even if your child does not know how to read or write, or draw, for that matter!

For my three-year-old, I asked him to tell me a story about himself. I wrote down exactly what he told me, and drew pictures for him to color. In his story, he was a ninja (with a mask) who kicked bad guys and helped people up when they had been pushed down. I left a few pages blank at the back for him to continue his story. (However, at this point, he rarely draws anything recognizable.)

Merikalyn loves to draw, and her pictures are usually recognizable. She drew a story about being a princess that turned into a mermaid. When she was done, she told me the story, and I wrote it down so she could trace over my words.

And hey, Mom, get involved too. You can see my little book (The Evolution of Mom) in the following post!

And if you're the dog, then you just watch. (And if you're the dog, then why are you reading this?)

You'll need several things. If you want to make smaller books, you'll need scissors or a paper cutter. You'll also need a stapler, and, of course, paper.
Trim sheets so they are all the same size. Make sure they are stacked up well, and fold them group of sheets in half. There are several ways to staple your book.
One way is to fold your book and staple it in the folded position. This is the easiest way bind larger books.
If you are making smaller books, fold your book, then open it back up. Then slide your stapler to the folded line and staple along the line. I show both examples on the picture above.
Making books is a great way to recycle paper. You can use paper bags, pieces of junk mail, even magazines! Just make sure the sheets are all trimmed the same size.
Now the real fun begins! Drawing!

For my three-year-old, I asked him to tell me a story about himself. I wrote down exactly what he told me, and drew pictures for him to color. In his story, he was a ninja (with a mask) who kicked bad guys and helped people up when they had been pushed down. I left a few pages blank at the back for him to continue his story. (However, at this point, he rarely draws anything recognizable.)

Merikalyn loves to draw, and her pictures are usually recognizable. She drew a story about being a princess that turned into a mermaid. When she was done, she told me the story, and I wrote it down so she could trace over my words.

And hey, Mom, get involved too. You can see my little book (The Evolution of Mom) in the following post!

And if you're the dog, then you just watch. (And if you're the dog, then why are you reading this?)
DIY Comic Books: The Evolution of Mom

by Mandy Mom
Evolution of a mom as seen through the drawings of a child.
(actually, I drew the photos, but they are based on real drawings of my
children's and my own as I aged.)
Evolution of a mom as seen through the drawings of a child.
(actually, I drew the photos, but they are based on real drawings of my
children's and my own as I aged.)
 In the beginning, all mothers had arms formed in place of their ears. Also, mothers seemed to be in a constant frown. (Doesn't this remind you of a two-eyed version of Mike Wazowski from Monsters Inc?)
 Over time, mothers evolved, and even gained hair, duck-like mouths, and well, bodies, as their arms moved down.
 Scientists aren't sure when mothers began to take on the form they have today.
 Eventually, mothers finally gained a sense of style.
 Which leads to the mother specifies as she exists today. A word to the wise. It might not be a good idea to encourage your child's artistic abilities by signing him or her up for an art class in, say, Characatures, because you might end up with an exaggerated version of mom you don't care for.

The End.
(Thank you for checking out my doodles. Please realize that these are merely doodles and do not represent my true artistic ability. Ha!)
(Thank you for checking out my doodles. Please realize that these are merely doodles and do not represent my true artistic ability. Ha!)
Friday, October 3, 2008
The Boxcar Children Activities (one)
 We're currently reading The Boxcar Children, a multigenerational favorite, by Gertrude Chandler Warner. I love a good book, and our curriculum is heavy with reading, so you'll find a lot of activities centered on specific books here at TPM.
We just finished the first four chapters of this book (so many good memories of my youth tied to this series), and I was aching for a cool little project to get the munchkins into. After sitting still for so long, they were eager to do something hands-on.
Today, we're building a Boxcar out of a box (coincidently, it's one of the boxes I received my curriculum in).
Here's how you can make one of your own:
Find a box. It can be a shoe box or a refrigerator box. Size doesn't matter. Paint or color it red. Have your children draw 4 children (2 girls, 2 boys) that will fit inside the box. (Little dolls will do as well, if you'd rather do that instead.) Have them act out scenes from the chapters you've already read.
As you progress in the book, the children can make other things, like the beds made out of pine needles (you could use raffia instead). Look ahead in the book and buy or make some of the foods the Boxcar Children eat (like milk, blueberries, fresh bread). Allow your children to taste the same foods the Boxcar Children are eating. It really gets them in the "spirit" of the book.
Reading books gives us a chance to have some wonderful conversations with our children. Discussing chapters afterwards helps children articulate and build their vocabulary and learn to tell stories. Garden of Praise has some great free educational resources, including comprehension pages that help further discussions on The Boxcar Children book.
Click HERE to go to the website.
Wednesday, October 1, 2008
Days of the Week: Praise Him!
When I was a kid, we use to sing a song about grumblers who "Grumbled all week long". Mom use to play it on the piano, and my brother and I would belt it out beside her. Here's a video of some people singing part of it on YouTube. (It's quite funny, really.)
Anyway, I always think of this song when telling the kids what's going on during the week as we go through each day. So, I changed the song (but kept the chorus tune) to teach them the days of the week.
 Praise God All Week Long!
Praise Him Sunday, Monday, Tuesday. Praise Him Wednesday too!
Praise Him Thursday, Friday Saturday- Praise Him the Whole Week through!
The Grumbling song starts with Monday, but I wanted to teach the kids the days of the week in the same order as they are on the calendar. Our Praise God song is a hit. It's easy to memorize, and fun to sing!
Subscribe to:
Posts (Atom)

